tl;dr: I contributed to a crowdfunded project to make a gadget for capturing digital images using an old-fashioned 35 mm film camera. The thing finally arrived and I tried it. I’m disappointed.
The long version is, well, long, so cut.
Background
Let me start by unpacking the tl;dr description a bit.
Film is now really rather expensive. I didn’t investigate thoroughly, but film seems to cost about 30–50 p per exposure, counting both the actual film and processing – which nowadays primarily involves scanning to digital files. Also, processing takes time. And if, like me, you’re not the most technically proficient photographer ever, the latency between pressing the shutter-release on a scene and seeing the disappointing result means that you don’t get any good shots at all.
I have a two old single-lens reflex (SLR) cameras which take pictures on 35 mm film: an original Nikon F (with the Photomic FTn metering head), and Nikon F3. I love both of them dearly; but I’m too impatient and incompetent to use film effectively.
A couple of years back, I decided that it would be awesome if there were some kind of gadget that I could attach to my old-fashioned takes-pictures-on-film cameras so that it could just take digital pictures instead. So I searched on the web and tripped over the crowdfunding campaign for I’m Back 35. I signed up.
That was the second half of 2021. I was feeling impatient around that time, so I finally joined the digital-SLR generation and bought a Nikon D780, which supports my old lenses properly. This is an awesome thing.
Anyway, after a year and a half of waiting, the thing actually turned up yesterday. In the intervening time, the batteries in the old cameras got tired and needed replacing, so I haven’t had much chance to play yet.
What came in the box
My perks package contained
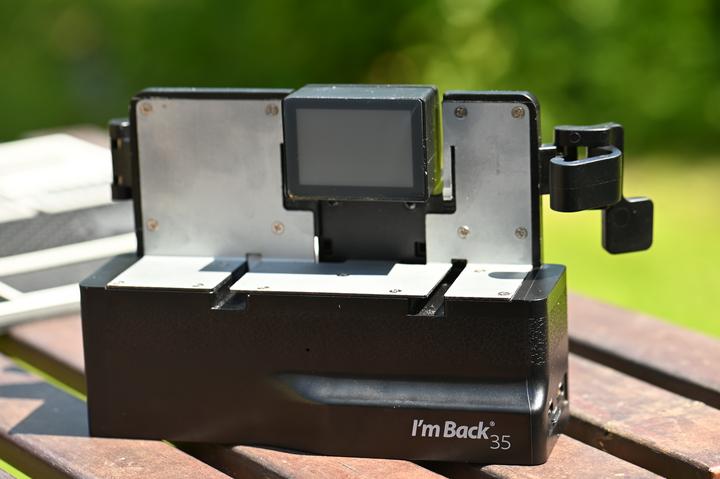
- the ‘I’m Back 35’ unit itself;
- a ‘generic’ mount for attaching the unit to random cameras; and
- dedicated mounts for the Nikon F and F3.
The unit came with a single glossy sheet of instructions. These are rather poorly typeset and not written in the best English. The I’m Back designers are (allegedly) Swiss, and their communications with backers have been written in rather good English, so I don’t know why the instructions are bad.
Batteries
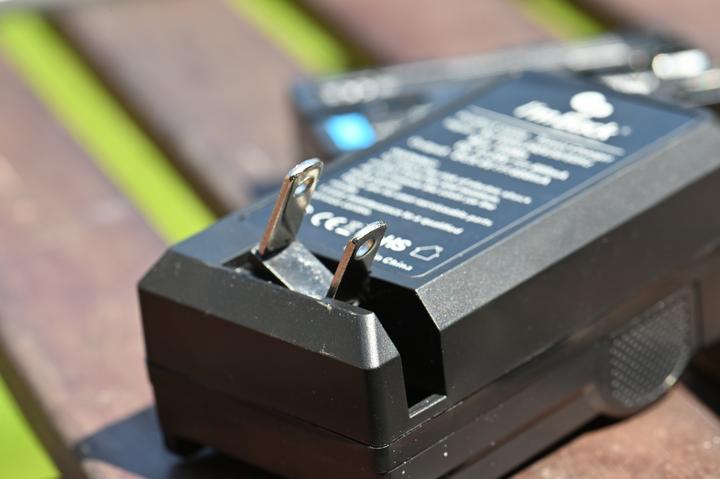
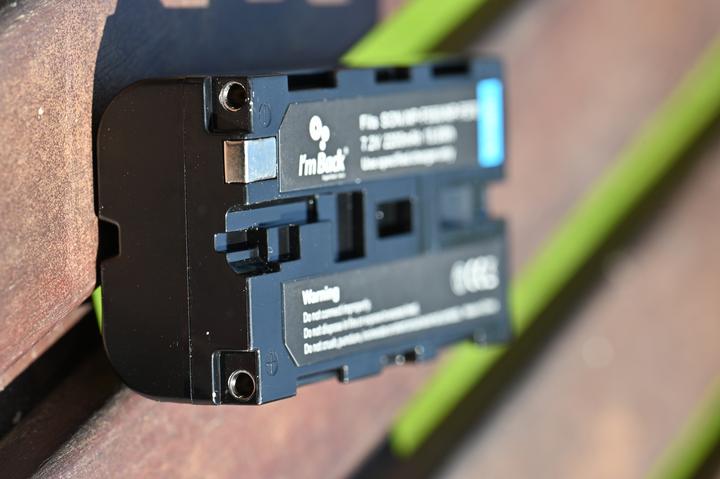
The main unit takes a nonstandard rechargeable battery, and comes with its own charger. I expect trouble a few years down the line when the battery deteriorates. The battery charger has a NEMA-1 plug built into it (on a little swivel thing so that the pins don’t stick out when you pack the thing away). It comes with a little Europlug adaptor. But, alas, I live in neither the USA nor continental Europe, and a BS 1363 adaptor was not included. I took this as a bad sign.
Anyway, I dug out a travel adaptor and left the battery charging while I tried to figure out how to fit the camera-specific mounts (below). The charger shows a red LED while it’s charging and a green LED when it’s done, which is nice and clear, though nothing actually explains this.
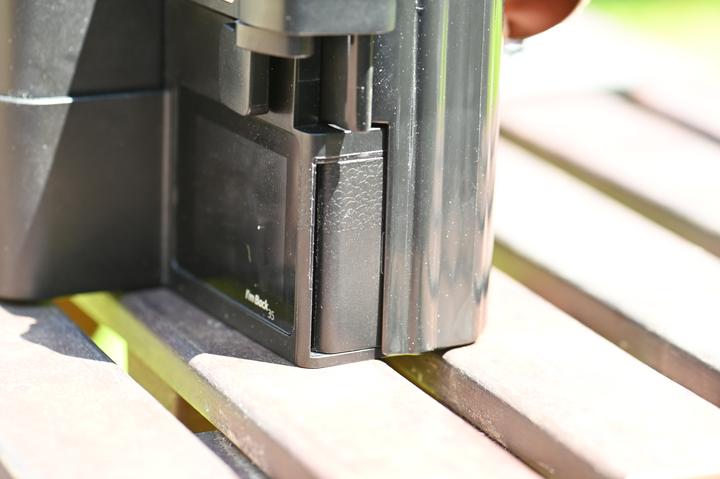
Once the battery was ready, I loaded it into the main unit and… nothing. It turns out that the battery doesn’t make particularly convincing contact with the main unit. It’s not really clear to me what the problem is. The battery’s contacts are two deep-ish sockets, while the main unit has spring-loaded pins which fit into the sockets. When I load the battry into the battery compartment without closing the cover, the power button actually brings the unit to life: the screen turns on showing a logo splash, and there’s an annoying feeping sound from the speaker. The inside of the battery compartment cover has a piece of foam which is supposed to hold the battery against the pins (I think); but it also has the effect of gripping the battery and pushing it off-centre as you slide the cover closed, and this breaks contact. If I close the cover and then carefully open it a little, then the contact is restored (though not especially stably) and the unit is usable.
The poor contact of the battery conspires with other design misfeatures to make the whole experience very frustrating.
Mounting
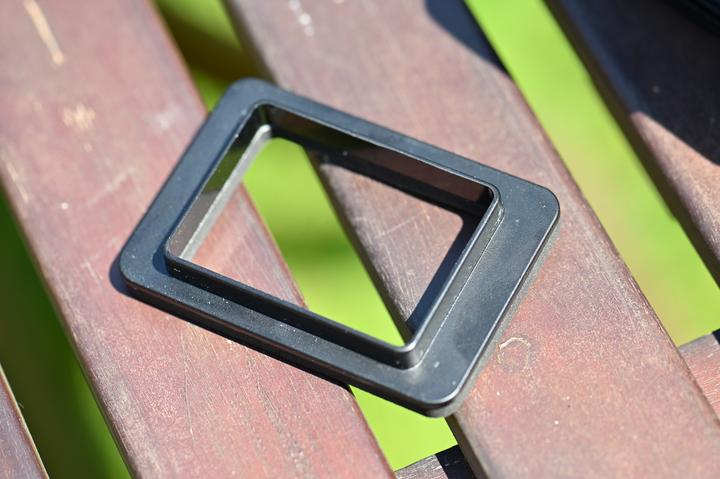
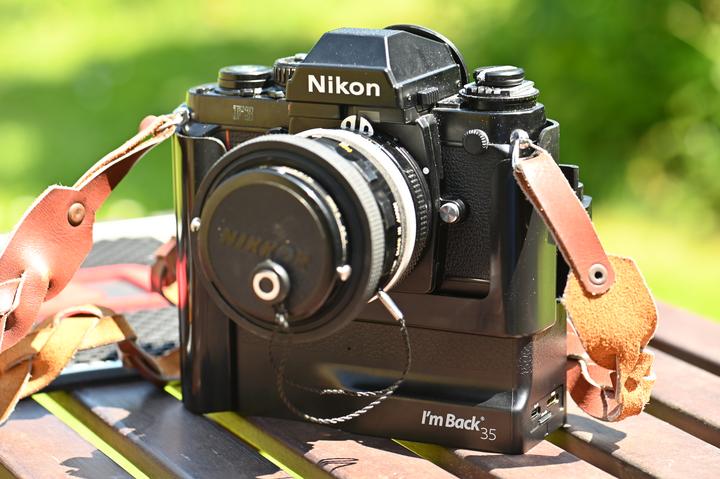
There are three pieces in all to attach to the camera: there’s the mounting attachment itself, the main digital photography unit, and a gasket which fits around the shutter.
To fit the I’m Back 35, you first have to remove the camera back. On the F, this is easy, because the back just comes off entirely as part of the film replacement procedure. The F3 back is hinged, but one of the pins in the hinge is sprung, so removal is pretty easy.
Next, you place the gasket around the shutter. The gasket is asymmetrical, but nothing tells you which way up to fit it. (I don’t mean that it’s wider than it is tall: that’s obvious. I mean that you can put it in upside-down if you’re not careful, and then things won’t fit later.) Then you slide the mount on from underneath, and secure it with a screw in the tripod mount.
Finally, you slide the main unit on from behind; it mainly sits beneath the camera proper. This is where you find that the gasket is upside-down; it takes a lot of persuasion even when everything is correct. The main unit is secured to the mount with a pair of plastic clips; the part of the main unit that fits into the gasket is spring-loaded, so as to cope with different camera thicknesses, but the spring is quite fierce and I once heard a nasty plasticky cracking noise while securing one of the clips because the spring had forced the unit out of position while I was setting the other side. Fortunately, I don’t think anything is permanently broken.
There’s only one of these gasket things supplied. So, to move the unit to a different camera, you have to take the main unit off, remove the mount, and transfer the gasket over. This is less fun than it sounds.
I have not used the generic mount.
The F mount is basically just a plastic sleeve into which the camera fits, with slots in the bottom for the main unit to slide into, and little wings on each side for the main unit’s clips to grab onto.
The F3 mount additionally has a long sticky-out bit on the bottom right. The F3 has a very small ergonomic grip on its front right side, an early 1980s precursor to the enormous finger grips on modern cameras. The sticky-out part on the I’m Back mount covers this grip and continues the contour down over the main unit. This seems like a lovely idea, but it’s misconceived because the contour also covers over the battery compartment of the main I’m Back 35 unit. It seems plain to me that they could have left a cut-out in this contour so as to leave the battery compartment accessible. This wouldn’t be such a problem if the battery maintained reliable contact, but, as I mentioned above, it doesn’t. This is going to be less than fun.
Finally, each of the dedicated mounts comes with a plastic cover which seems to fit over the shutter. This seems like a good idea: camera shutters are incredibly thin and delicate. Alas, the cover doesn’t actually fit until you take the gasket off, and to do that you have to take the whole mount off. At this point, you might as well just put the original camera back on and be done with it. Well, nearly.
The Nikon F3 has an interesting quirk. There’s a little spring-loaded nubbin round the back of the camera body. There’s a flange around the camera back: I guess that’s mostly there to keep light out, but it also presses down on this nubbin when the back’s closed. That has the effect of letting the frame counter advance. The frame counter starts at around −3 because the first few frames’ worth of film get ruined while you’re putting the roll in. If the nubbin is released, the frame counter springs back to −3 and stays there no matter how you wind the frame-advance lever.
The quirk is this: before the frame counter reaches zero, the shutter speed is limited to 1/80 s. I think the idea is this: the F3 selects its shutter speed automatically (if you ask it), but if you have the lens cover on, the light meter thinks it’s very dark and will choose a stupidly long exposure time. (It can select exposure times much longer than you can pick manually.) So, while you’re just winding along to the first usable exposure. not taking pictures of anything important, the camera limits its shutter speed so it doesn’t waste lots of time taking perfectly exposed pictures of lens caps.
All of this has two problems. The first one is Nikon’s fault. They bungled the whole system: the shutter speed limit is an upper bound, not a lower bound, so it can still take hours if the lens cap is on, but it will always take at least 1/80 s even if lens is uncovered and its a bright sunny day outside. I think this is because Nikon reused the flash-sync logic for this feature, which would explain both why the cutoff is 1/80 s rather than anything more sensible, and why the bound is the wrong side; but it doesn’t explain why they didn’t realise that they’d made this blunder and fix it before shipping.
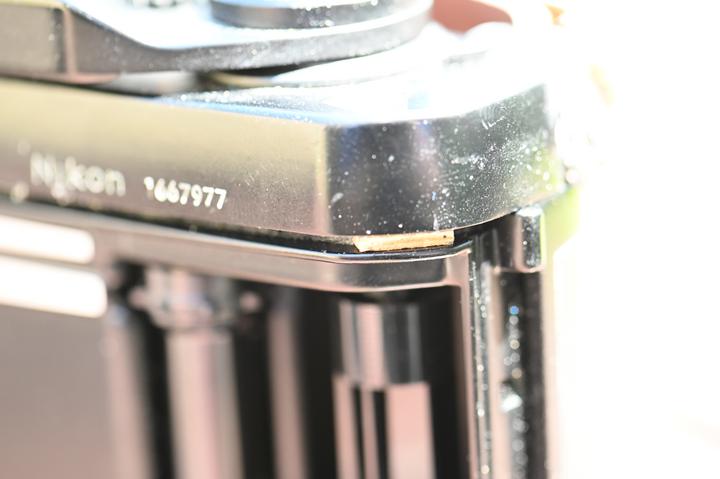
The second problem is that the I’m Back 35 cover doesn’t have anything to press down on the nubbin, so if you’re using the I’m Back 35, then you’re limited to rather slow shutter speeds. I emailed them about this in October 2021, but never got an answer; obviously they never bothered to do anything about it, or even acknowledge the problem. Lacking a proper solution, I’ve wedged a bit of broken matchstick over the nubbin.
Photo 7: A piece of matchstick wedged into the F3 to convince it that the back cover is closed and it should advance the frame counter
Other setup
There’s a slot in the side for a Micro-SD card for storing pictures. My D780 takes a full-sized SD card, and it seems that this is conventional in digital cameras. But the I’m Back 35 has to things differently, so Micro-SD it is.
So I load a spare 64 GB card into the slot. The card clicks nicely into the slot, and pops out again easily if you press it again; for some reason I don’t understand, though, the card has to go in upside-down. I turn the unit back on: splash screen and feeps, and then the main view. This shows the scene detected by the sensor, overlaid with a number of icons. Of course, the sensor can’t see anything because the shutter is closed. (Also, the lens cover is on and the mirror is down.)
Anyway, one of the icons indicates that the card is present; but when I try to take a picture, I just get a big Memory Error banner. The instruction sheet tells me that I can format the card by ‘clicking on the Tools icon and after “Format”.’ Which one is the Tools icon? Touching anywhere on the screen causes a feeping noise. Mostly, the icons just disappear and come back if I touch again (feep). There’s a Play button at centre-left (well, a right-pointing triangle in an oval border), which tells me there are no pictures (not a surprise), a FM button in the bottom left which lets me fiddle with ISO settings or try to capture videos; I press Photo (feep), and wait a second or so while the main screen comes back. There’s a terribly drawn hammer-and-screwdriver icon bottom right, which is probably this Tools icon, so I press that (feep). I get a menu. Down the left are four icons, which I decode as general settings, photo settings, video settings, and ‘contemplate the world for a while before returning to the main screen’. On the right are four menu options. Pressing the top three icons flips between different menus, but there’s a recurring theme: four options in each menu, and none of them say Format.
Hmph. Maybe this Format option is a myth. I try a 2 GB card, which works but can only store one picture. (I’ll discuss what it’s like to actually take pictures later. I never did look to see what else was on that card: maybe it was full of other stuff and really did only have space for one photo.) So, anyway, there’s something it hates about my card. I really do want to find that Format option.
It took me a while, but I figured it out. The crucial hint was in the FM options. As well as the square buttons for selecting options, it also shows a big dot and a little dot. The display might look like it’s 20-year-old tech, but it does actually recognize swipe gestures as requests to scroll, and if I swipe then I get a couple of new icons and the dots reconfigure themselves to tell me that I’ve scrolled. Scrolling is not even slightly smooth. Indeed, I think I didn’t even notice that it had happened the first few times, and just got confused about why the options weren’t in the same places as they’d been a minute ago.
Anyway, scrolling is apparently a thing. Unlike the FM screen, the Tools menus don’t show any dots or anything else to indicate that they might scroll, but they do, and Format is indeed there. I press it (the card doesn’t contain anything important) and we’re actually off to the races.
In passing, I notice that the unit thinks it’s 2019. I’m not sure how a gadget which first saw the light of day in 2023 thinks it’s 2019, but it did. There’s a Date/Time option in the menu too. That takes me to a screen which lets me set the date and time. Each element of the date – day, month, year (I hope) and hour, minute, second – has a little spinner widget which one can adjust by swiping up and down. If the screen were a bit more precise and the interface a lot more responsive, this would work well. As it is, each time I try to swipe, something changes, and there’s a feep. It’s usually the thing I was aiming at, but not always. Spinning through large ranges (e.g., for days-of-the-month, or minutes) takes ages because it doesn’t spin very quickly. Homing in on the correct value for anything takes ages because it usually overruns. And, throughout, the interface is infuriatingly sluggish.
Suffice to say, setting the time is an extremely unenjoyable experience. I can tell you that it does get slightly better with practice, but not a lot. Why did I get a lot of practice? Because every time the battery wobbles a bit, the unit resets and its clock gets reset.
Taking pictures
Ooh, yes. This is a thing for taking photographs. Let’s plug a lens into the F3 and see what it can do.
The first thing I notice is that the I’m Back 35 unit is far from an ideal shape. The image sensor isn’t placed just behind the shutter as one might expect. Instead, the sensor itself is underneath the camera, and there’s a sort of periscope arrangement which transfers the image from behind the shutter to the sensor. The periscope thing sticks out the back of the camera pretty much exactly where my cheek wants to be as I look through the camera viewfinder to take a landscape-orientation picture. (Taking portrait-orientation pictures is fine, if you’re wondering.) The periscope also prevents the camera from lying comfortably against my chest when it’s hanging on its strap.
The next annoyance comes when I actually try to take a picture. There’s a little cluster of three buttons on the back of the unit. There’s a power button which just turns it on and off. There’s a button marked M: if you press it twice quickly, it toggles between ‘manual’ and ‘automatic’ modes. It starts up in manual mode, and that’s what I used here. I’ll explain automatic mode later. The third button is labelled OK: this is the one which actually takes pictures.
The procedure is this. You compose your scene, focus the lens, dial in the aperture, and select a shutter speed, just as usual. You can also mess with the ISO setting in the I’m Back 35 menus, but I’ll discuss that later. You wind on the film to cock the shutter (if that’s a thing your camera makes you do by hand). And then you press OK on the I’m Back 35, hear the feep, and press the shutter release on the camera. If you time everything right, the I’m Back 35 has captured a digital photograph of the scene. Fortunately, the OK button is actually placed fairly well where my thumb can find it comfortably and without me having to look.
I usually don’t time everything right. If I press the Play button on the touchscreen, then I get a preview of the image, which is often just a black rectangle. I think the I’m Back 35 gives me about a second to release the shutter. I’m fairly sure I usually get there in time; there’s a reasonable chance that I’m often too early, but I honestly can’t tell. Anyway, if I don’t check, there are good odds that I get nothing at all. If I do check, then at least I know I have to throw that picture away and take another. Of course, getting to the preview screen was just one press, but getting back to the main screen is about three. Oh, and if I forget and just try to take another picture from the preview screen, I press OK, hear the feep, release the shutter, and I’ve just wasted my time because I’m Back 35 has ignored me.
Enough of this. Let’s take some actual pictures. For science!, and because I can, I took pictures of the same scenes with my D780, with the exact same (60-year-old!) lenses. This cancels the optics out of the comparison; it also means that any ineptitude I might have regarding the manual focus or aperture selection applies to both cameras, because the D780 can’t do these things automatically with my old lenses any more than the F3 can. (I’m told that the Nikon FA can do automatic aperture selection with my old lenses, but I don’t have one of those.)
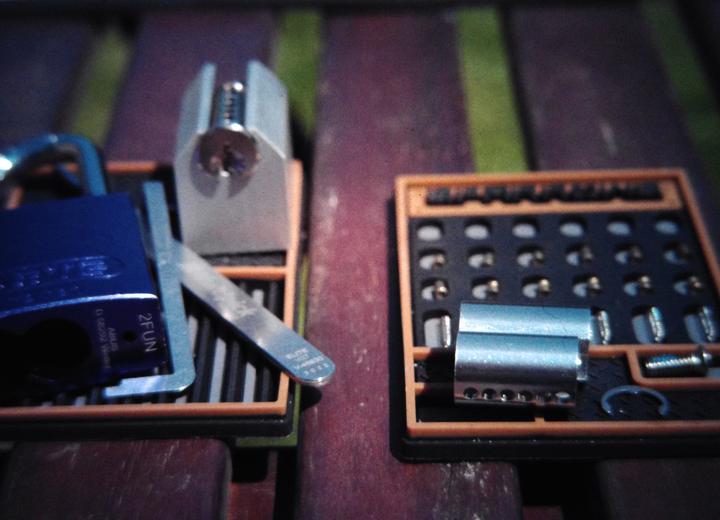
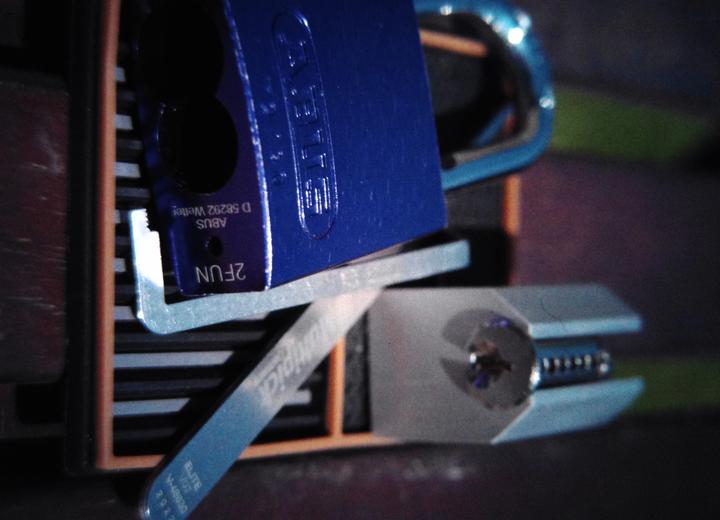
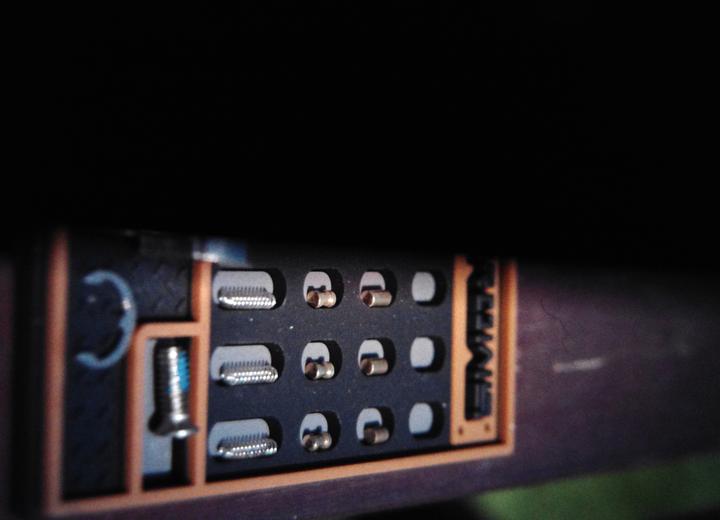
The close-up of the disassembled Abus 72/40 were taken with a Micro-Nikkor-P Auto 1:3.5 f=55 mm at f/8 and f/16. The pictures of Susan (the water-lily) were taken with a Nikkor-S Auto 1:1.4 f=50 mm, at f/4. (If you care, the pictures of the I’m Back 35 were taken using the D780 with an AF-S Micro-Nikkor VR 105 mm f/2.8G; see the EXIF data for the gory details. I’ve not post-processed any of the images. I intended to take all the pictures at ISO 100, but I forgot to override the D780’s auto-ISO, and it took one at ISO 150 without me noticing; if this has any effect at all (and I can’t see one) then it favours the I’m Back 35, so I’ll let this slide.
The I’m Back 35’s pictures all look very grainy. This isn’t a terrible style choice: it rather fits in with the antique vibe, but it’s not always what one wants.
I’m Back 35 consistently loses material from the edge of the frame. Nikon cameras, at least, are extremely reliable for capturing the image that I see in the viewfinder.
I have no idea what happened in photo 12, but half the picture is completely missing.
There’s a definite softness towards the edge of the I’m Back 35 image which doesn’t occur on the D780, so it’s not caused by the lens. Colours are also rather muted by comparison.
There’s a black splodge towards the bottom middle of the early I’m Back 35 pictures. This was a visible mark on the screen which I tried to clean off. It actually moved about and disappeared during the test shoot and I have no idea how.
Discussion of ISO reminds me. Yes, you can adjust the ISO setting in the FM screen. The I’m Back 35 forgets the ISO setting when you turn it off. Of course, you presumably dialled in the ISO on the camera as well, and the camera won’t have forgotten, so there’s a good chance that they’ll disagree next time you start everything up and you’ll have a horribly mis-exposed picture. (This isn’t just the battery wobbling: I’m Back 35 forgets the ISO setting even when it successfully remembers what time it is.)
So, about the ‘Automatic’ mode. If you press the M button twice, you get into a different mode. Now, the I’m Back 35 takes a picture as soon as you press OK, and tries to adjust its ‘shutter speed’ (and ISO, maybe) so as to get a ‘correct’ exposure. To use this, you have to lock the camera’s mirror up and open the shutter, maybe by using its timed-exposure setting. With the mirror up, your only chance to compose the scene is using the tiny screen on the back of the unit. Of course, there’s no rangefinder to help with focus, and the screen is too small to see clearly, so there’s no real hope. Also, you’re at the mercy of the I’m Back 35’s light meter, and I’d be surprised if it’s better than a high-quality antique camera.
I encountered the next annoyance when I came to retrieve my pictures
from the Micro-SD card. Every other digital camera I’ve ever used,
including cameras in phones, store pictures under DCIM, with a
subdirectory for the camera; DCIM\100D780, to pick a random example.
Apparently, that’s just not good enough for the I’m Back 35, which puts
its pictures in imback\Photos instead, presumably so that programs
which expect to retrieve pictures from a digital camera can’t find them.
Of course, I’m Back 35 doesn’t write especially useful EXIF data to its
images. I can’t blame if for this: it’s not like most cameras can tell
it anything useful to put in there. It doesn’t have an option for
setting EXIF comments or copyright information; though, given how
annoying it is to set the time, it’s not likely that text entry would be
an edifying experience, and, because the battery doesn’t fit properly,
one would have to enter this information annoyingly often.
Experiences with the company
I found I’m Back GmbH to be hopelessly unresponsive. As I mentioned, I sent them email in 2021 about the F3. They neither answered me, nor did anything to fix the problem.
They sent around a campaign update asking for backers to email in with their postal addresses and dedicated mount selections. I did so reasonably promptly. There was no reply. After they’d started sending out finished products to backers, they sent round another update listing backers who’d (allegedly) failed to send in the necessary information, listing me among them. I emailed again, and left public comments on the campaign page explaining that they were apparently losing email. The comment attracted one answer to a secondary question I’d asked (about the fact that the second update gave the impression that the F3 mount wasn’t available any more; apparently this was just an error. Eventually, I received a one extremely curt response confirming my selections. I kept checking the (public!) page where they published the tracking numbers for orders that they’d dispatched hoping to see one for me, but that never happened; and then, last Friday, the postbod rang the doorbell to tell me I had an unexpected package.
In summary, my interactions with the company left a lot to be desired.
Conclusions
Thinking of the I’m Back 35 as a Thing That I Bought, I’m bitterly disappointed. I’d hoped that it would give my old cameras a new lease on life, but the results simply aren’t good enough to justify its many usability problems.
But it’s not just that. I pitched in with crowdfunding a project to make a thing, and the thing was indeed made. It’s far from perfect, but there’s clearly some demand. Indeed, I hope that there’s enough demand for a thing like the I’m Back 35 that someone makes one that’s actually good. And if they do, then I can’t count my contribution as wasted.
[Edits: 2023-06-11: Fix case of ‘ABUS’.]




Excellent review. Thank you. I agree with your conclusion. I did not test so systematically but had similar disappointment with the Imback 35. Hopefully will evolve.